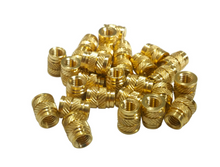
These create much more convenient and professional parts than using "captive nuts" (where you have to design a slot for a nut, and then place the nut in the slot and hold it there while affixing a screw). They also can be used in some situations where captive nuts just don't work.
These are inserted into a hole in the print that is slightly smaller than the insert, and set in place using a soldering iron to melt the plastic around the insert. The inserts have a slight taper and small fins that the plastic flows around, resulting in an extremely strong bond.
Rather than adjust designs around the limitations of 3D printing (supports, print bed size, etc), divide your parts into separate components that fasten using these inserts and machine screws. Not only does this give you greater flexibility when designing a part, but also allows you to re-print only failed components rather than full assemblies - saving time and money.
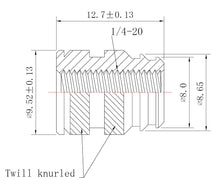
These are threaded 1/4-20, which is the correct size for most camera tripods.
The OAL/Height is 0.5". The recommended hole diameter tapers from 0.363" down to 0.321", and the depth should be approximately 0.030" deeper than the OAL (so approximately 0.53")


